(10) Luke Pedlar: Much quieter than his first final. He tried to work into the game but didn’t do enough. Laid an important tackle on Changkuoth Jiath in the third to spark a goal and had a small lift but he needed to do more to create chaos for Hawthorn’s backline. 3/10
(12) Jordan Dawson: Looked dangerous resting forward from the midfield. He was brave and strong around the ball, but quiet by his standards. Tried everything to lift his team, but too many were carrying the heavy loads of others who weren’t performing. 5/10
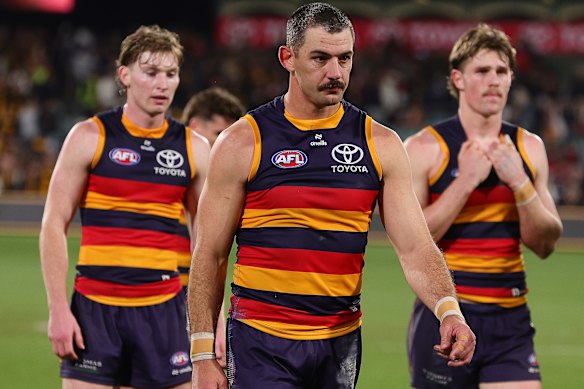
Taylor Walker and the Crows didn’t have the best of nights.Credit: AFL Photos
(13) Taylor Walker: Quiet early and showed frustration. His choice to go for goal instead of hitting Darcy Fogarty in the second summed up Adelaide’s night – missed opportunities and poor skill execution. 2/10
(14) Jake Soligo: Worked with Berry to try and stem the damage at stoppages. Tried hard to drive his legs through contests in the second half but lacked ball-winning impact. Another midfielder who was outplayed. 3/10
(16) Max Michalanney: Allowed Chol to fly at the footy but had a solid start. A costly turnover in the second led to a Hawks goal, though he did provide some strong intercept moments. 4/10
(19) Zac Taylor: Applied tackle pressure early but had little forward presence. He was given some midfield minutes in the second half to get him involved, but his impact was minimal with two disposals in the first half. 1/10
(20) Mitch Hinge: He displayed strong running patterns and had a few key intercepts early, but injured his ankle midway through the second, spent 11 minutes on the bench, and was subbed at half-time. 2/10
(24) Josh Worrell: Set up forward-half intercepts early, produced a goal-saving lunge before half-time, and was strong in the air when Adelaide’s backline was under siege. Undoubtably their best player on the night. 6/10
(25) James Peatling: Started with a point and a goal in the first term, showing pace and intent. Impact dropped away, particularly after half-time. 2/10
(28) Alex Neal-Bullen: Quiet by his standards but worked hard with plenty of one-percenters. Adelaide lacked his normally creative and clean ball use. 3/10
(29) Rory Laird: Matched up on Jack Ginnivan and held him well. Worked hard to be used out of the back half and set up offensive chains with composed ball use. Thrown into the midfield late. 5/10
(30) Wayne Milera: Played on Nick Watson and gave him too much room at times inside 50 but created intercepts and rebound play. One of Adelaide’s best defenders in the first half, using the ball well going forward. 4/10
(32) Darcy Fogarty: Missed a crucial snap in the second, adding to Adelaide’s wasted chances. Kicked a goal in the third to keep them alive, but overall didn’t deliver across the finals series. 2/10
(33) Brodie Smith: Defensively sound, laid some crucial tackles, and wasn’t beaten in one-on-ones. 3/10
(43) Reilly O’Brien: Showed some strong early ruck work against Lloyd Meek but was undone by skill errors. Beaten in the air as the game wore on. 4/10
(44) Isaac Cumming: Worked hard both ways but was exposed by Hawthorn’s attacking speed, with Josh Weddle kicking one on him early. 3/10
(48) Mark Keane: Allowed Jack Gunston the opening goal with a lapse. He tried to peel off to intercept but didn’t get the balance right. At times he was left stranded by poor pressure up the field, but he still let Gunston find too much space and it was incredibly costly. 2/10
(8) Josh Rachele (substitute): Back from injury (his first game since Round 17), he was subbed in after half-time. His first kick set up Fogarty for a vital goal in the third. He added two consolation goals in the last, but the game was already gone. A huge effort to come back from such a significant injury. 3/10
Hawthorn
(2) Mitch Lewis: Was subbed out with 12 minutes left in the third quarter after a four-disposal night. His one shot at goal went across the face, but delivered a nice pass inside 50 to Gunston in the third term. 2/10
(3) Jai Newcombe: The best player afield. The Hawks’ midfield beast won the opening three centre clearances, and amassed 11 of his 28 disposals and six of his eight clearances by quarter-time. Newcombe set the tone and remained an excellent contributor. Watson called him “Mr September” post-match. 9/10
(4) Jarman Impey: Played a backseat role this time after a dynamic performance in last week’s victory over the Giants. Gathered 11 disposals, and was not as efficient as usual, but still provided some dash. 6.5/10
(5) James Worpel: Warmed to the task and was part of why Hawthorn’s midfield comfortably beat their Crows counterparts, including setting up one of Gunston’s five goals with a great mark and pass in the third term. 7.5/10
(6) James Sicily: The old Sicily briefly returned when he took exception to Meek trying to calm him down after he gave away an early free kick. But he was great again with 21 disposals and nine marks, as well as doing his bit defensively. 8/10
(10) Karl Amon: Amon’s had far bigger games, and won only two of his 17 disposals in the opening quarter, but one of them was a magnificent strike from beyond 50 metres to help the Hawks go to the first break ahead. 7/10
(11) Conor Nash: Played a support role for his fellow midfielders and continued to chip away, but was a bit untidy at times. 6/10
Loading
(13) Dylan Moore: This was a classic Moore game. He didn’t dominate, but was a wonderful cog in the machine. Amassed 17 disposals, kicked an important goal nearing half-time and had eight score involvements, including a slick handball that created a Sam Butler goal. 7.5/10
(14) Jack Scrimshaw: The former Sun has become an underrated part of a brilliant defence. His kicking skills and intercept ability are weapons for the Hawks, and he continues to improve as a one-on-one defender. 8/10
(15) Blake Hardwick: Everyone outside Waverley Park is finally realising how good Hardwick is. He does all the little things that coaches love, is rarely beaten down back, and provides plenty of rebound, too. But Hardwick’s decision not to rush a behind in the third term cost the Hawks a goal. 8/10
(16) Massimo D’Ambrosio: Another Hawk who was more of a support act on this night. Won 16 disposals and did little wrong. 6/10
(17) Lloyd Meek: Meek easily won his ruck battle with Reilly O’Brien. He put the ball at his foot soldiers’ feet, was strong in the contest and even stepped in to try and cool James Sicily at one stage. 8/10
(18) Mabior Chol: Took a couple of impressive marks, but his set-shot kicking let him down, and he misfired on a handball that could have set up an Impey goal. Spelled Meek in the ruck and played his role. 6/10
Like a fine wine: Jack Gunston seems to be getting better with ageCredit: AFL Photos
(19) Jack Gunston: The ageless veteran performed a key role in the Hawks kicking away in the third quarter, booting three of his five goals and taking five marks inside 50 in the term. Gunston had no trouble against All-Australian squad member Mark Keane. 8.5/10
(23) Josh Weddle: Weddle is an athletic marvel with a tank that seemingly never runs out. He is the wildcard in the Hawks’ pack, and again started on a wing before swinging forward once Lewis was subbed out and finishing with 1.3. 7.5/10
(24) Josh Battle: What an addition this man has been to Hawthorn’s defence. Racked up 10 of his 17 disposals in the opening term, helped keep Fogarty and Walker quiet, and had 10 intercepts. 8/10
(25) Josh Ward: This was arguably Ward’s finest game, even if Newcombe overshadowed him. No one won more than his 17 disposals to half-time, and he had a team-most 31 by night’s end, along with five clearances and six inside 50s in a composed display. 8/10
Jack Ginnivan at his antagonistic best.Credit: Fox Footy
(30) Sam Butler: Had a forgettable moment when he skied a kick in his defensive 50 that eventually led to a Hawthorn goal in the third quarter, but finished with two goals of his own and laid a match-high nine tackles. 7/10
(31) Connor Macdonald: That is back-to-back good finals performances from Macdonald, who finished with 18 disposals and kicked a goal to blow Hawthorn’s margin out to 33 points late in the third quarter. He also showed great composure deep in defence in a pressure moment in the first half. 7/10
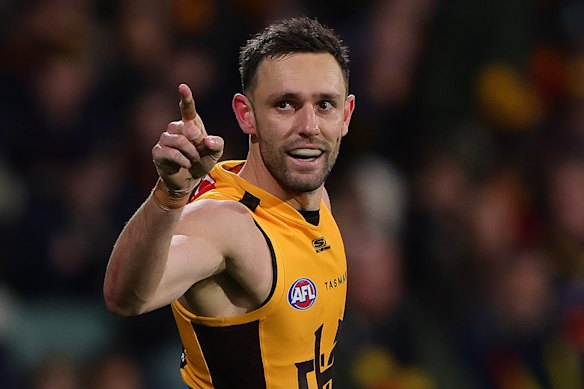
(33) Jack Ginnivan: It was a quiet night for Ginnivan on the stats sheet, but he barely stopped yapping at his Crows opponents, including sledging Michalanney for a turnover in the second term, as he lived up to his reputation as a pest. 4/10
Nick Watson kicked a pearler of an early goal, and produced a celebration to match.Credit: Channel Seven
(34) Nick Watson: Kicked both his goals in the first quarter, but the second one will be remembered most: he sprinted down the loose Sherrin, gathered, then kicked a spectacular goal from deep in the pocket while falling down. Errant goalkicking cost him a more prolific night. 7.5/10
(37) Tom Barrass: It wasn’t the ex-Eagle’s best night – and it could have been worse if Adelaide did a better job funnelling the ball through his opponent, Thilthorpe, who kicked three goals. Had only seven touches. 6/10
(9) Changkuoth Jiath (substitute): Entered the match midway through the third term, and took time to get going. Five of his six disposals were handballs. Jiath probably didn’t do enough to earn a full game next week. 3/10
Keep up to date with the best AFL coverage in the country. Sign up for the Real Footy newsletter.